Friday, February 28, 2014

Starboard fuel tank Progress

I have been pondering how to build the side of the fuel tanks with access ports so that the tanks can be cleaned and inspected....With there being 2 tanks,and each tank having 2 chambers(due to the baffle) that meant having 4 access covers. The access covers for the water tanks worked out all right, but were a lot of work. The problem is in attaching the studs to the fiberglass well enough that they do not come loose when you are taking the covers off. For the water tanks, I made aluminum bars that I threaded the studs into with locktite and then embedded the bars in the fiberglass. It turned out to be a very slow process. For the fuel tanks I decided the mount the studs in the covers and then have the covers bolt into the tank from the inside rather than the outside. Then the liquid pressure will be pushing the cover onto the tank wall rather than off.


 I also decided to make the the covers using 1/4" thick aluminum rather than fiberglass. That way I can just thread bolts into the aluminum with locktite and then seal the back of the cover with what ever I coat the inside of the tanks with...
I have not come to a decision on that yet.


After drawing the side out I realized that there was not much side left after you cut the access holes out. I usually make these parts using 1/2 Power ply as a core, but there would be so much waste it did not make sense. Then I realized that there really were not any large unsupported areas and a core was not necessary.


Rather than lay-up the whole side and then cut the access holes I made a simple mold for the side. I will line the mold with wax paper so the resin will not stick to it. I cut all the strips of 24oz  combo mat and 4 mm core mat to fit in the spaces that represent the wall. There will be 5 layers total, 2 layers of 24 oz. Combo mat followed by the core mat then 2 more layers of 24 oz. Combo mat. I lapped the joints in each consecutive layer. The total finish laminate should be 7/16" thick, more than enough. Between the center dividing wall and the two baffles the side will have plenty of support.


Tomorrow we are off to the Trawler Fest here in Palm Beach Gardens to see what inspiration we can find.

Friday, February 21, 2014

Starboard Fuel Tank top started

Finally back to work after a week off to move mom....
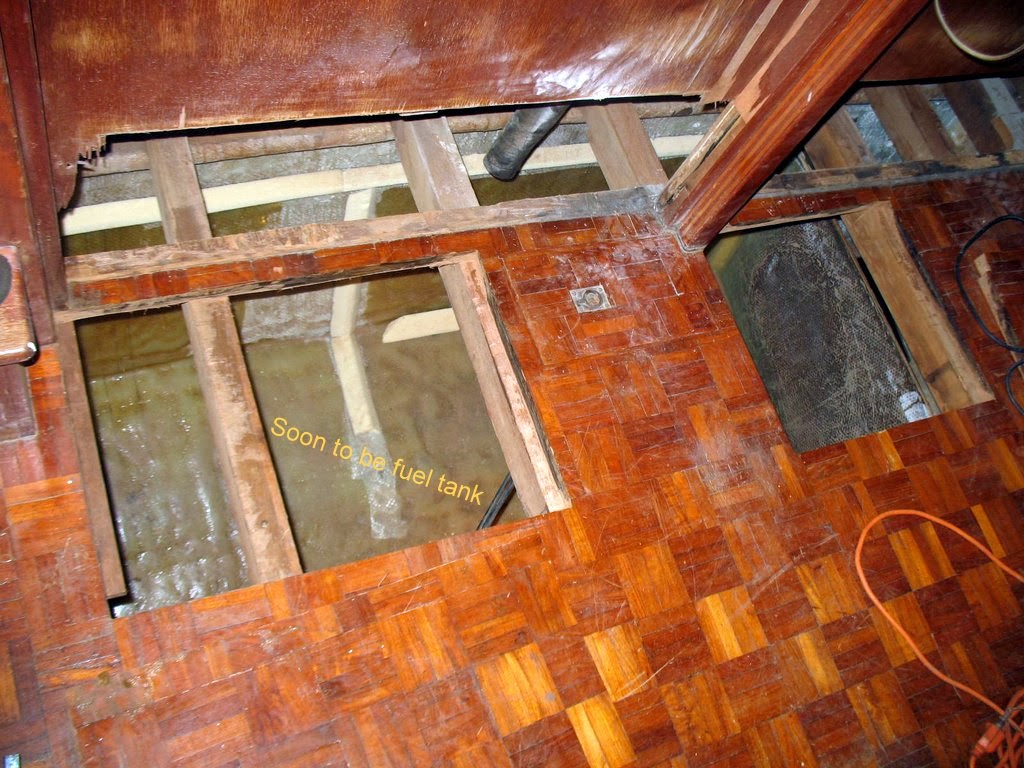
Today I started on the starboard fuel tank top. Yesterday I cut holes in the cabin sole of the main cabin.

The top of the fuel tank will be 12 inches below the Cabin Sole, lots of good storage space. Good place to stick a compressor/condenser unit for the Freezer or Main Cabin AC. I plan to make the inboard side wall of the tank come all the way up to the cabin sole. This will provide support for the cabin sole as well as divide to engine room from the storage space.


A view down through the aft access.
I have not finished the tank yet. You are looking at the floor and aft end of the tank.


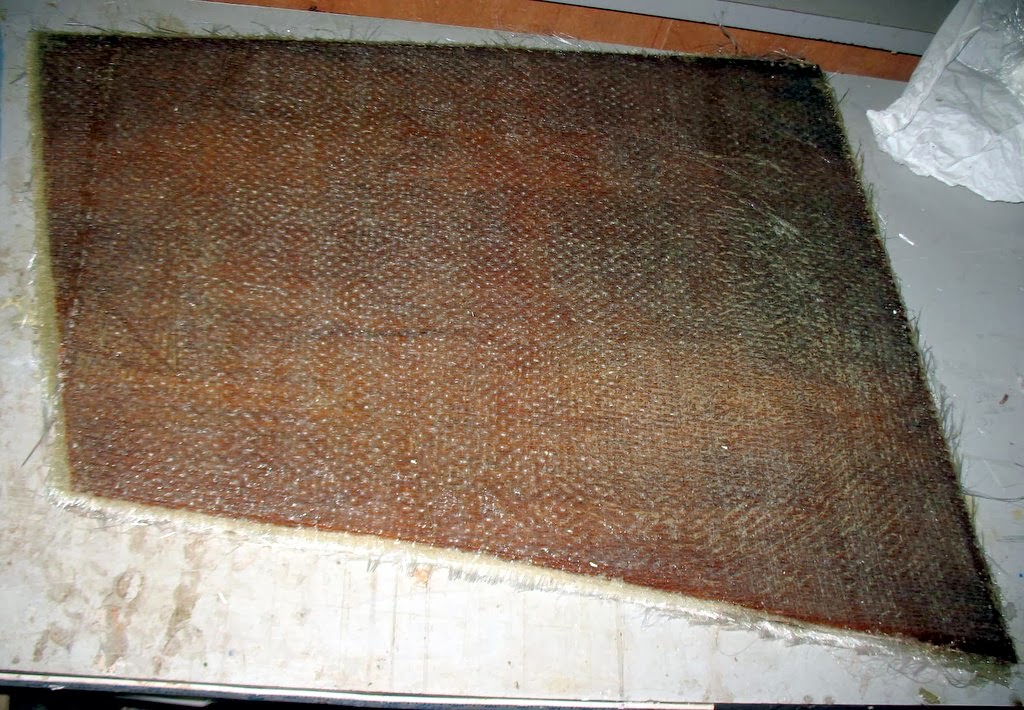
Here is the top for the starboard tank with 2 layers of combo-mat on both sides. In this picture you can see the vacuum bagging film covering the glass work. I cover the glass work before it sets to keep the finished surface from contacting the air. The resin I am using does not have any wax in it, so the cured resin will still be tacking for days. If you excluded the air then it sets hard. You can buy resin with wax in it to accomplish this. The problem with the wax is that you have to grind it all off to get a good bond with any glass work you attach to it....So no wax, the vacuum bag sheet does the trick for most of it. The problem is in getting all the air bubbles out....


 Same top with the plastic removed, ready to trim the edges.


I am using 1/2" thick Power-ply as the "core" of the walls and top of the tanks. I have given the sheets in this picture one coat of resin in preparation for glassing. They are yet to be cut to size. I just coat them with any extra resign I have left over while glassing.


Friday, February 7, 2014

Progress on the Starboard Fuel tank walls

I decided to fill and sand the faces of the tank walls before I put them in the boat. Hoping to not have to spend so much time sanding before I coat the inside of the tanks.
So here is one of the walls after I have trimmed the excess glass off from around the edges and filled and sanded both surfaces.


 The forward wall all glassed into the hull and one coat of resin to seal everything up. The walls are tabbed in with 4 layers of 24 oz Biax tape. I cut the tape into a 4",6",8" and 10" width the glass them in starting with the 4 inch covered by the 6 then 8 and finally the 10" over all. That way the tabbing will be tapered with only one edge exposed.


Here is the aft wall which I was not able to finish taping in the aft side. Ran out of Biax tape. So I did the front side today. You can see the temporary brace I installed to hold the the wall in the correct position until the glass set.


Thursday, February 6, 2014

Forward and Aft walls of Fuel Tank

Started putting the Starboard fuel tank together today. Made patterns for the forward and aft end walls using 1/8 Masonite.

Here is the pattern for the aft end. I cut strips of Masonite then shaped the edge of the two that have to conform to the shape of the hull. Then I glued those two together in the right position to conform to the angle of the chine. Next pieces were added the represent the top and inboard side. The problem is in gluing them together with hot glue while making sure they were either level or plumb... that is when my two extra hands and arms would have come in handy. 


After checking to make sure they fit right, I traced their outline out on the 1/2" plywood. After cutting them out and checking the fit once again, I covered each side with 2 layers of 24oz Combo mat. After laying them up but before the resin set I covered them with Vacuum bag material and placed a flat smooth panel on top with weights. That will give me a good start on having a smooth flat surface when done.
Thinking of buying a vacuum, pump for this. Could be used for AC work too.


Here are two pics of the panels after the plastic has been removed. There are still some wrinkles in the finish, but far better than the finish if the roving had been left to cure without the plastic.


The plan is to glass these two pieces in place tomorrow then fit the dividing wall in the middle. I wanted to get the two end walls in place first. Then I can make sure the center wall is in line with the ends so the top and inboard walls will be straight.

Tuesday, February 4, 2014

Beginning of New Fiberglass Fuel tanks

Well after 2 days of removing problem thru-hulls that were either plastic or had bad rotten backing blocks and grinding all the junk glass work off ,I finally got started on the new fuel tanks. I also discovered that the generator exhaust, which is 2" diameter hose was hooked up to a 1-1/2" thru-Hull.
How much more could a 2" thru-hull have cost? I bought a new stainless steel one for $50.00 or so!!!


After cleaning all the dust out I laid out the lines for the sides of the new tanks. I then cut 1" thick Polyurethane sheet to get fillet strips  which accomplish two goals(1) they keep the wall of the tank from creating a hard spot in the hull and (2) they keep the fiberglass tabbing from having a sharp 90 degree  bend which is weaker.
I glued the strips for the 3 transverse walls of the tank in with hot glue. It only needs to hold the strip in long enough to shape the wall and glass it in. Then they are buried in glass and not going anywhere.


One more shot of the strips. Hopefully Thursday I will make the 3 walls and glass both sides in prep for installation. My plan is to build the ends and dividing wall first, then the top followed by the inside wall. I will have access ports in the inside wall. After glassing them all in I will build and glass in the baffles in each tank. The baffle does not have to seal against the hull as do the other walls and top.

Wednesday, January 29, 2014

Rusted fuel tanks

I had been hoping the fuel tanks were still serviceable, I knew the tops were badly rusted but not no holes appeared when I scraped the loose rust off.


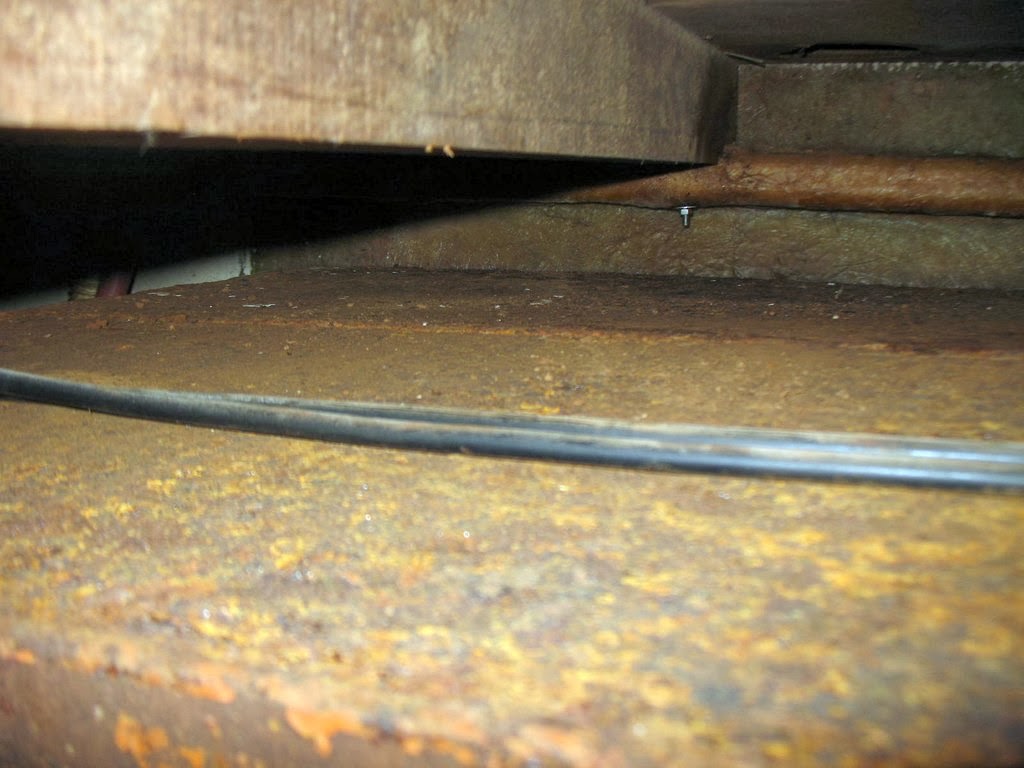
There was a lot of rust on top of the tanks I spent about an hour scraping with a very large crow bar and vacuuming the loose rust.


However when I removed the partition surrounding the starboard tank I found it was leaking at the bottom.Notice the stained black area, it has been leaking for some time. I actually got lucky here, when I started to cut the tank the hole opened up much bigger.
So it was time to cut the tank out. I tried all the various cutting tools, 3" and 4" grinder with carbide cutting wheels, jig saw with metal cutting blade, but the fastest turned out to be the acetylene cutting torch....


I did cut the first section off the front of the tank with the grinders, so I could clean the last of the diesel out.
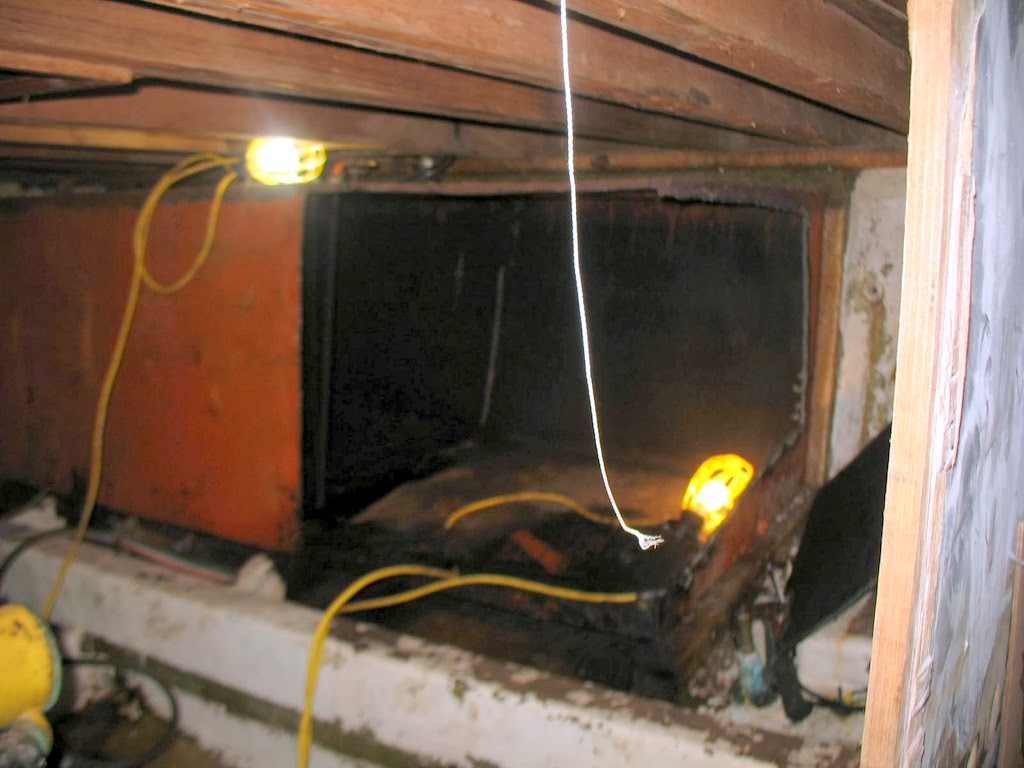
The white you see in this picture is paper towels buried in the much that was in the tank. Doesn't look like the tank was EVER cleaned. Which is a real shame the sides and most of the bottom of the tank were just fine. It was just in a few spots in the bottom 1/3rd of the bottom panel that had rusted.


I don't know of any way to reliably repair those spots. There was a layer of rust in the muck. The real shame is that there was a drain plug at the lowest corner of the tank. All this could have been prevented by just draining  the water out every 6 months or so.


So we decided that while we had the boat all torn apart we should go ahead and replace the tanks.


I started with the metal cutting angle grinder disks. It was very slow frustrating work, the 3" cut much slower but the disk lasted much longer than the 4" disk. After cutting 1/3rd of the front side off I cleaned that section out and went to it with the torch. Only had to put a few fires out during the process. The worst was when I cut the baffle to the next section out. I tried unsuccessfully to wash the dirt out with the spray nozzle on the hose, but there was still gunk left that caught fire. But the hose was handy and successful at putting the fires out.


It took about  2 days to cut the whole thing up. First the front then the sides and baffles. Then I could bend the top down enough to cut it into section. That left the bottom and back side(up against the hull). I ended up putting pieces of steel I had cut out under the bottom to protect the hull while I cut the bottom up. I had the garden hose right at hand the whole time. I also made sure to keep the areas of the hull near the work wet. It all worked out, no burns to the fiberglass.

Tank removed, pressure washed and ready to start building the new tank. We have decided to put 4 tanks in, 2 to each side. Yes it will cost a little more and be less convenient when filling, but I like splitting the tanks up so each does not carry so much fuel. I estimate that the old tanks held around 400 gallons  each. I am planning to carry about 600 gallons in 4 tanks. That will give me more room for other equipment. At 4 miles per gallon that is a cruising range of 2400 miles. We are not planning on crossing the pacific!!

Monday, January 20, 2014

Back to the blog..

Lost touch with the blog during the holidays. But I am back...for now. Can't say I have ever been much of a writer.

I finished glassing all water tank tops on and started  working in the engine room. I was moving towards building the hull sides up and sun deck. However in the process I had to remove an existing access into the engine room from the aft cabin. Cutting it out created a nice opening into the engine room. So I decided that I should get the work I needed to do in there out of the way before closing up the hole.
Funny how one thing leads to another. I ended up removing everything except the engine and the generator from the engine room. I must say there was an interesting collection of various kinds and sizes of hosing and bits of wiring. It's all gone now so I can get a clean start when I go to reinstall the equipment. I also tore out the old walls they had built around the fuel tanks as well as the ceiling along with the 35 year old loose fiberglass insulation they had installed between the joists. But I have finally gotten the "old" boat smell out. Turns out that the acoustical ceiling tiles that had lined the bulkheads and ceiling with had absorbed all the oily water smell.
When I removed the wall from around the starboard tank I discovered that it was leaking...More on that next post.

For now here are some pics of the tank tops.


Here is the aft end of the Port tank and


the aft end of the Starboard tank. The white you see is epoxy paint on the top in the area where I was not going to do any more glass work. When I have finished glassing in the bulkheads and flor structure I will paint the whole area with white epoxy.


Here is the finished upper tank that rises though the cabin sole under the bunk. You can see the two clean-out ports bolted in place. Every compartment in each tank had a clean-out port.


Here is a close-up of one side of the top. All tops were glassed on with 3 layers of biax tape.


Here is picture of the aft end of the port tank. This was before I learned that the starboard tank leaked. I beefed up the glass work holding the tank in place.


I also beefed up the bulkhead  connection. It looks like they had used 2 layer of mat to tab the bulkheads in place. Not really enough, so I added 3 layers of biax tape over what they had done. The hole you see in the bulkhead is where the exhaust hose entered the aft cabin. It is about 8 inches lower that where it exits the hull, meaning that the whole hose would fill with water when the engine was running. Proper installation says that the exhaust hose shall have a continuous drop from the riser pipe coming out of the water lift muffler to the where it exists the hull.


Here is a view of the start of the mold for raiing the hull sides to firm the aft cabin. They are 3/4" Ply covered one side with Formica. They are clamped onto the out side of the hull with a 10 degree tumble home. There is a 4" wide piece at the top to form an angle to attach the deck to. More on that later.