Wednesday, October 19, 2016

Main Engine Exhaust and Aft Main Bulkhead

The main engine exhaust passes though the aft cabin and out the transom.
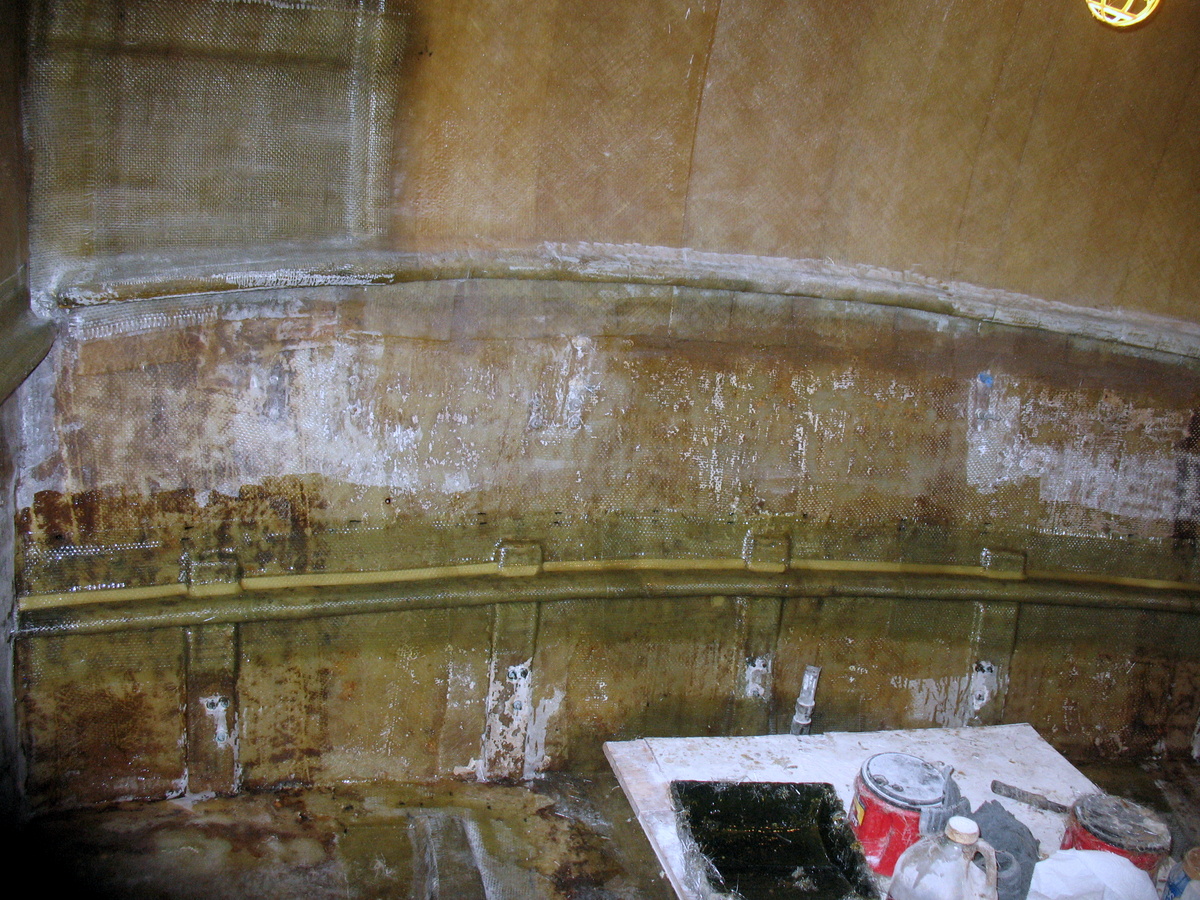
The original build had the hose dropping down to the cabin sole then rising at the transom, so the hose was always full off water. According to Nigel Calder this is not good design. I also discovered that they had used a 3" hose for this long run while all the rest of the system is 3-1/2" hose. That was replaced with all 3-1/2" hose.


  I made a round fiberglass tray to support the hose with an even grade as it goes aft to the transom. The tray is supported at each vertical stringer.


With that done it was now time to actually start building the boat back.


This is the bulkhead that divides the main salon from the aft cabin and the sun deck above the aft cabin. The area in white will be part of the medicine cabinet in the aft head. The area right the the left of that in the picture is the locker for the propane flash heater. The propane tank storage is right on the other side of the forward partition of that locker.
the opening below the white area is the linen storage in the aft head. The heat exchange/electric water heater will live there too.


Here is another shot of the bulkhead showing the upper area.The whole thing is 12 feet tall and 13 feet wide. I decided to piece it together rather than putting up full sheets and then cutting the openings to save materials. All slices were done with biscuits and epoxy resin. The thick horizontal piece near the top of the picture is the salon cabin top. It ends at this bulkhead. The dull area in the plywood are where I covered it with a layer of 1.5Oz. mat and 18Oz. biax cloth. The upper area will be the outside face of the bulkhead and the lower one is one of the shower walls.


The area of plywood that the light is shining on is the starboard side of the little space I added to the engine room so you could get to the stuffing box for the main drive shaft, which you see at the bottom of the picture just aft of the crawl space. The stuffing box will actually be under the shower in the aft head.


Tuesday, October 18, 2016

Stairs from main salon to aft cabin

My apologies for not keeping the blog up. I have been very occupied with outside work, so there are many days when nothing gets done on the boat.
I have managed to get a fair amount done since March.  I  take pictures of the work each day so I have a record. I will try to cover all the work that has been done in the next few posts.

I decided to make a locker under the stairs going down from the salon deck to the aft cabin deck to house the freshwater pressure system and filters. There will be the pressure pump with a small pressure tank(so the pump does not cycle on and off as much), water filter set and a small water softener.


So I started by closing the area under the stairs off from the engine room.  The piece to the right is up against the aft end of the starboard fuel tank and extents to the outboard side of the outer stringer. The piece to the left sits on top of that stringer and rises up to the underside of the cabin sole. All joints are glassed so it is water tight. The white piece extending down from the cabin sole in the middle  is inside the locker area. The strips of wood running horizontally are the supports for the steps. The piece at the bottom of the picture is the last step which is aft of the main bulkhead and outside of the locker.


Here are the other 2 riser pieces in place. The middle one sits on top of the tread support for the 2nd step up. All the pieces fit in without screws. These are temporary ones for while I am working on the boat. I will replace them with nice ones when the time comes. The yellow triangle is resting on the salon cabin sole.


Now all the treads are in as well. the large triangular tread is what holds the riser under the top step in. Again they fit in without screws. that is why the upper tread has that little tail on the right side. I have been using these stairs for several months now and they have never come loose.


As you can tell by the toes of my shoes at the left of the frame this is a view of the stairs from above in the main salon. I am amazed at how much space there is under them. This boat had so much room that was just completely wasted..

Sunday, March 6, 2016

Installing Port side Stairs and Propane locker


After I had the two side support pieces made I glued and screwed them into place on either side of the opening. I used 5200 and about 8 screws to each piece, so I don't think they are going anywhere.


But just to make sure I also glassed them on each side with 3 layers of 1807 biax tape. This way the drains will be completely sealed.


The aft wall of the locker was next. This actually separates the propane locker from the flash heater compartment. Both side of the plywood were coated with 1 layer 1.5Oz Mat and 1 layer of 2415 Biax cloth before being installed. It will be glassed in on both sides.

The real beauty of this design  is that the propane tanks, the stove and the flash heater are right next to each other. So the longest propane line with be about 12" long. The regulator, transfer valve and shut off valve will all be right in the same locker.


Next I built the two remaining walls that form the area for the 4th tank under the cabinets. Each panel was coated with resin then glassed on the locker side before installing. All the joints were then glassed on the inside of the locker to seal all the joints.


After fairing all the corner glass work in I gelcoated the whole interior of the locker. I am not sure why but this is the only picture I could find of the gel coating. I will have to take some more tomorrow.


The final step was to put the top on the area where the 4th tank lives. It was glued and screwed together with 5200. So now the whole locker is sealed off from the rest of the interior of the boat. All I need to do is cut the drain hole in the side of the hull. I made the floor of the locker so it would drain to that hole.

Tuesday, March 1, 2016

Side Deck Stairs

I had this brilliant idea (you know the kind) that I could stash 4 20 Lb. propane tanks in a locker under the port side stairs up to the Sun Deck and the dead corner in the galley. So I started to build it by cutting out the floor of it.


This is not a great shot of the floor but you can get the idea. So there would be one tank located where the one in the picture is, the 2nd tank just aft of it, The 3rd tank to the right side of the 2nd tank and the 4th tank will sit on a shelf over the 2nd tank.

One neat little hole full of propane tanks. ABYC rules say that this locker has to be completely sealed off from the rest of the interior of the boat, thus everything is glassed together. It also has to drain directly overboard, so there will be a hole through the hull at the forward bottom corner of the locker. The floor also drains to that corner. Once I got the floor in I realized that I need to know the height of the forward partition before I could build it. Will that depended on the height of the stair tread at that point, which depended on the height of the Sun Deck where the stairs finished. So I had to stop the propane locker and build the little piece of Sun Deck that leads forward to the stairs and then the stair supports.

I did not take pictures of the building of the little piece of deck. But I did record the process of building the stair supports.


It took me awhile to figure out just how to make these buggers. The problem is that if the stairs are going to open than you have to have drains on each side for the water to run off instead of getting into the locker. this is the mold I made for that support and drain piece. It is upside down right now. It is made of 3 layers of plywood, the larger or outside piece is what forms one side of the drain, the middle and top piece form the rounded tread supports. The outside wall of the opening becomes the other side of the drain channel.


Of course you want that to be nicely rounded over and the wood pieces are cut square. So I used this special clay to form the fillets on each side of the channel. It is a slow and tedious process that has to be done for each piece you make. Luckily I have only two to do for this side.


Here is the mold ready to be glassed. The glass will roll down off the mold and onto the larger white piece under it. That will form the flange that I will screw to the side wall of the opening. the 40 Lbs. Lead weights hold everything in place.


One last closeup showing the channel that will form the lip that supports the stair treads. I have already sprayed the gel coat on at time.


Here is the finished piece after I have pulled the mold apart, filled the little imperfections and sprayed another layer of gel coat on. I also filled the rolled over part with a filler I make from grinding powder and resin to add strength to the support.


This is a shot of the back side of it. The part that has no gel coat on it gets glassed and screwed to the wall of the locker opening. The top of the support is at the bottom of the picture and the bottom at the top, so you are viewing it from above the stairs. I found the additive to put in the gel coat that makes it cure very smooth with a great gloss.

Galley Port Bulkhead and first piece of Sun Deck

This is work that I did over the last month and Half. The work was very sporadic because I kept getting called away to my moonlighting job... So I was not keeping the blog up to date.
The first step was to build new piece of the port side cabin side to replace the door opening and rotted existing one.


So here it is viewed from the inside. Part of the new cabin side actually goes all the way down to the main salon deck level where it forms part of the propane locker that is located under the stairs going up from the side deck to the Sun Deck. That is the dark area behind the bucket. To the right of that it only goes down to the side deck level like the old one did. To the left or just aft of it is the opening into the propane locker that forms part of the storage area. That is under the back dead corner in the galley cabinets. More on that later.


Here is a shot from outside. I re-used pieces of the original glass work, glassing them together to form the new wall. No sense in throwing away good glass work to turn around and have to lay up and finish new glass work...
It looks a little rough now but the pieces are all level with each other I just need to sand and paint it over again.

You can see the inboard side of the stir support and the forward partition of the propane locker.

Just above that is the first little piece of the Sun Deck. You can also see the first of the 3 panels that will make up the Sun Deck.

This turned out to be a much more complicated little area than I had realized it would be.

Tuesday, December 22, 2015

Main Salon Demo started

It's funny how it all ties together in one big jigsaw puzzle. I am trying to maximize the use of space as much as possible. There is not that much space in boat and you don't want to waste any of it. In working the drawings over I realized I could fit the propane tanks under the side stairs leading up to the sun deck which is right next to the galley stove. I even managed to utilize the dead back corner of the galley cabinets to fit two extra tanks in. I also managed to fit the flash heater in right behind them so the propane lines will be really short.
Of course a propane locker that fulfills ABYC requirements is not an easy thing to build. It has to be completely sealed from the rest of the interior of the boat, have a direct drain over board and accessed only from the exterior of the boat.


So yesterday I began doing the demo in the aft port quarter of the salon where all this is going to go in.


There had been a long term leak in the fly bridge deck right over this area so all the plywood "core" was rotten.
Nothing like nice black mold. I decided the strip all the plywood out of the cabin side there to get a fresh start.


Today I continued with the demo. I decided to remove the aft cabin side today too. I am moving the aft end just a little further aft and making it plumb. With that removed I realized that the really was not much holding the outside skin of the aft portion of the port cabin side. Sooooo


I just finished removing it. I have to close up the door anyway and I need to grind all the bondo which they used to bond the plywood to the glass off as well. It is a very messy dusty job and I was not looking forward to doing it in the boat. Works out great, I was able to grind all the junk off down below in the open. Then I can bond it back on to the new plywood core in the shop before re-installing it up on the boat.
So back to the butane tanks. You can see part of the side deck still left just below the blue tarp. I will cut it at the lower end of the sloped part of the hull side just above it. The stairs go up there. it is about 15 inches down to the deck beams that hold up the main salon floor. The propane locker will sit on top of the those under the stairs.


Here is a close up taken from down below in the aft cabin. I will try to take pictures as it all comes together.

First Deck Panel Completed

I am a little late with this post, due to a cold...again. But I was able to beat this one in 2 weeks!!!!


We laid up the first 4 foot wide deck panel last week. Here it is with the core in place. I made a mold for the an upside down panel. That way I would have a finished surface on the top. So we laid up 3 layers of the 24 Oz Biax material I have and 1 layer of 1.5 Oz. mat with the cored embedded in the wet mat. Those are 50 Lbs. lead bars on top of it.


A closeup of the core and top skin. If you look closely you can see how well the resin saturated the scrim of the core.


Here is the completed panel before trimming. We laid up 2 layers of 1.5 Oz. mat and 18 Oz. Roving.

When we put it up on the boat it seemed a little too flexible. The laminate schedule is based on a book I have on boat building. I think that when they are all glassed into one it would be stronger. I am working on trying to do a better calculation of the strength. It may be that I have to go with a 2 inch core. This panel will be fine because it has a lateral bulkhead under it with only a 30 inch span or so.

Sunday, November 29, 2015

Aft Cabin Glass work done....at least the big stuff

The 2 final  projects in the aft cabin structural work were to glass in the aft ends of the main stringers and the rudder log and reinforce the lower transom horizontal stringer. First the Rudder shaft log....

For some reason the builder did not make the "log" ,which really is just a 4" thick piece of teak glassed into the hull to stabilize the rudder shaft, fill the whole space between the two main stringers. The light colored material you see is polyurethane foam which I use to fill the gap between the stringers and transom and the shaft log. It would have been very difficult and weak to glass from the hull up over the stringers and then down to the hull for 3" and then back up onto the log. That is why I filled the voids in with foam.


Then I glassed the whole thing in using 2 double layers of 1.5Oz mat and 24Oz. roving. Now it is one very large piece. At the 4 corners it is 4 double layers thick. Now I have a nice large area to mount the steering gear to.


Next job was to reinforce the rather poorly done glass work on the lower horizontal transom stringer. After grinding, yeah there is always grinding, all the old paint and crummy glass work off I had to add foam fillets to the hull to stringer joints both top and bottom. Without the foam the glasswork will make a hard 90 degree angle between the hull and stringer which is very weak. The foam breaks that into a more gradual transition. The vertical raised areas with the bolts coming out you see are where the swim platform bolts into the hull.


 Here's a shot of the whole stringer with the foam in place in the top hull to stringer joint. That's my work table on top of the water tank that extends up under the berth ( bed).


Here are 18 pieces of cloth cut and ready to be glassed in. I stack them with the last piece I will glass in on the bottom. It is always nice to pick up that last piece of glass and know that you are almost done!


Here it is after nearly 3 hours of glassing. It is slow work do to all the curves and how low it is on the transom. Notice how you can see the foam fillets through the finished glass work.

A closeup of the underside of the port end of the stringer. All done. 
I am finally done with correcting all the poor structural work in the hull. I have replaced all the rot in the stringers and reinforced all of them from the forward cabin back to the transom. Next stop the deck sections mold.


Tuesday, November 24, 2015

Starboard Secondary Stringers all glassed


                                                      Looks a lot better than ....


There are 2 layers of 1708 biax plus 1 layer of 1.5 Oz. Mat on each stringer. I glassed the vertical leg in first and then the horizontal leg. So each stringer takes 6 pieces of cloth and the there are 5 stringers to each side which makes it 30 pieces in total. No wonder I am tired tonight. 

I actually finished that work about 1:30 had lunch and went back to grind and  prep the rudder log for glassing.


For some reason they did not make it the full width of the space between the two main stringers. So I filled the spaces in with expanding foam then trimmed it flush with the log and stringer tops. It also did not fit back to the transom so I filled that as well. Thursday I will glass everything together so it will be in there solid, plus it will be easier to mount the steering gear. Just another 16 pieces of cloth, but they are smaller. The last job in here will be to strengthen the lower horizontal stringer across the transom. The I will finally be done with correcting and reinforcing the internal structure of the hull.

Sunday, November 22, 2015

Progress on the Starboard Aft cabin stringers


I cut all the old junk secondary stringers on the Starboard side out a couple of days ago.  One of the vertical stringers was half full of water!!! You can see the dark area just ahead of the forward stringer.


Here is a closeup of the water leak. Not something I really want to see in my boat! You can also see the rather poor job done on these stringers.


Here is a shot taken after I had cut everything out and ground all the bad glass work off. There was a lot of the glass work that had not bonded to the hull laminate. The telltale sign is the glass being a lighter color, than when you grind it it gets lighter then pops off just as you grind through it. Took 5 hours of grinding to get everything cleaned up on the Starboard side and the transom.


The next job was to glass the horizontal stringer with 2 double layers of 24 Oz. Roving and 1.5 Oz. Mat.


I used Combo Mat which I had to wet out before I put it on. The advantage of combomat is that the mat and roving are stitched together so when the mat is wet it does not slide off the roving. The main disadvantage is that it is very hard to wet out if you apply it with the mat side down. Another disadvantage I found is that it does not conform to compound curves as well as separate mat and roving does.... Anyway it is done.


Next came glassing the outer side of the Starboard outer stringer in the aft cabin. This is the last bit glassing to be done on the stringers. Seems like I have been working on them for ages.
The last bit of glasswork before building the secondary stringers  was to finish glassing in the aft starboard side of the aft engine room bulkhead. That got another 3 layers of 1708 biax plus 1 layer of 1.5Oz. Mat. I also made and installed the limber hole to drain any water from this area into the engine room where it can find its way to the bilge. I make a fiberglass tube by wrapping 1708 biax around a PVC pipe covered in wax paper. After it cures I drill a hole through the bulkhead for the pipe. Then I seal it in with resin thickened with grinding dust. That way I know that the water does not get into the stringers like before.
I laid out and cut all the secondary stringers this afternoon. Hope to glass them in tomorrow, weather permitting.


Saturday, November 14, 2015

Aft Cabin Port side Stringers done

Progress was held up by outside work for the last two weeks. Before that I was able to fit the stringers in the right locations. Some of them line up with bulkheads that I will glass on top of them.


I started glassing them in last weekend and was able to finish them up today. Each stringer has two double layers of 1.5Oz mat+ 24 Oz. Roving. They are solid and several will get a bulkhead glassed on top as well.

 
They sure look a lot better than what I tore out. They are much stronger as well. The old ones were only 1-1/2" tall and about an inch or so wide with straight sides. The new ones are 2" tall with a 60 Degrees slope to the hull the average width is about 2 inches, they are 1" wide at the top.


I was also able to strengthen the aft side hull to bulkhead glass work on the aft engine room bulkhead I added 3 layers of 1708 biax cloth plus one layer of 1.5Oz. Mat.
Tomorrow I will move all the tools from the starboard side to the port side and tear all those stringers out. Onward!!