Diary of the rebuilding of a Marine Trader 44 trawler from a "Classic" to a "Sundeck" design.
Tuesday, March 10, 2015
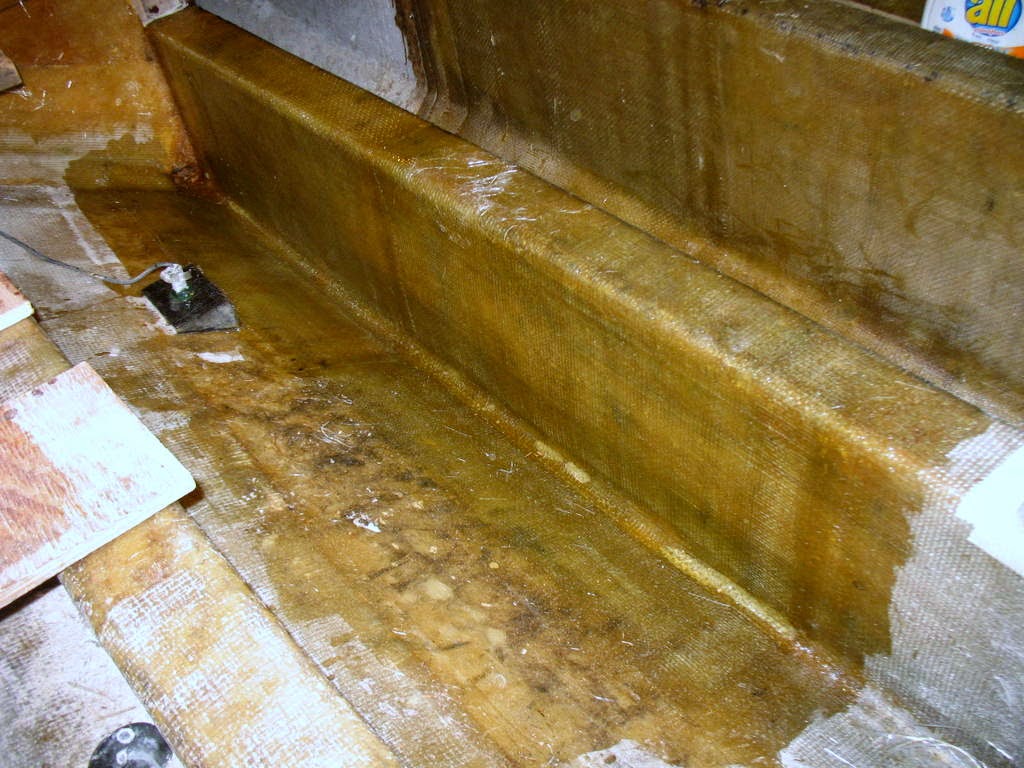
Stringers all Glassed in Engine room
Finally the last section of the stringers in the engine room is done. It turns out that it took about 40 yards of mat and 40 yards of roving to do all the stringers in the engine room. not to mention the resin.
The next project is to continue beefing up the stringers in the fwd part of the boat. I will only do 2 layers on the main stringers for the next 8 feet or so. It will harder to get to and the septic system will be glassed in there as well. That will help to strengthen it up too. Then there is only the few feet under the forward cabin left.
Monday, March 9, 2015
Moving right along
It is amazing what you can get done when you have a chance to work at it. Spent the morning and late afternoon glassing the forward section of the starboard main stringer. So both stringers are done all the way up to the forward engine room bulkhead.
Not much to look at, but it sure feels good to have that done. Tomorrow I hope to finish the port side main stringer. I spent some time today filling and gluing the old glass work back in place so I can glass over the whole mess.
Looks like a real Frankenstein mess. The plywood in the inboard side of the stringer was rotten in that whole area. It is all solid now and tomorrow it will all be glassed over.
Filled in this interesting little hole I found way down at the bottom of the bilge all the way forward under the generator. They had a 3/4" thruhull with a cap screwed on it there. I never knew it was there and you would never have been able to get to it way down under the generator...So it is glassed up on the inside and will get another 6 layers of glass over it. Then I will grind a tapered area out on the outside to fill in as well.
Midday was spent buying more 1.5Oz mat. I finally decided to buy a roll, it is about 1/2 price that way. I did not realize how much glass it takes!!! I think I have gone through 30 yds just reglassing the stringers.
Not much to look at, but it sure feels good to have that done. Tomorrow I hope to finish the port side main stringer. I spent some time today filling and gluing the old glass work back in place so I can glass over the whole mess.
Looks like a real Frankenstein mess. The plywood in the inboard side of the stringer was rotten in that whole area. It is all solid now and tomorrow it will all be glassed over.
Filled in this interesting little hole I found way down at the bottom of the bilge all the way forward under the generator. They had a 3/4" thruhull with a cap screwed on it there. I never knew it was there and you would never have been able to get to it way down under the generator...So it is glassed up on the inside and will get another 6 layers of glass over it. Then I will grind a tapered area out on the outside to fill in as well.
Midday was spent buying more 1.5Oz mat. I finally decided to buy a roll, it is about 1/2 price that way. I did not realize how much glass it takes!!! I think I have gone through 30 yds just reglassing the stringers.
Tuesday, March 3, 2015
Engine back home
Spent the morning opening up a limber hole in the outer stringer next to the engine and adding new limber hole under the engine. It took about an hour to bore the hole through the stringer to get this in. The stringer is about 4-1.2" of solid teak which I was drilling a 2-1/4" hole through at an angle.
I made fiberglass tubes by wrapping wet 1708 fiberglass around a slit PVC pipe wrapped with wax paper. After the glass kicks you can usually slide the pipe out. After boring the hole I drive the fiberglass tube in and glue it in with resin and filer. That way the limber hole is completely sealed though the whole stringer. I made them big enough so hopefully they will not clog.
I painted the bilge under where the engine sits with MacroPoxy epoxy paint. This will seal the fiberglass so if any water sits in the bilge it will not seep into the hull. Also makes it a lot easier to clean. The entire engine room will be painted when I am done. Had to finish this painting last night so it would have time to cure before I moved the engine. It is of course already dirty, but a little vacuum action will take care of that.
Last job before moving the engine was to fit the floor piece in on the starboard side. Much easier to do when I could stand next to it before I moved the engine. The round cut out is a weep hole so water coming through the limber home in the outer stringer can drain under the floor board to the lower limber hole. The floor board is removable for cleaning.
The two posts you see the bottoms of are there to move the engine. They will be removed tomorrow.
And there she is...back in place. Still has all the lifting gear attached. I still need to align the engine tomorrow. It will be interesting to see the stringers are perfect....
As you can see the bell housing at the aft end of the engine just fits between the stringers. The shafts look to be aligned, but we will see tomorrow. I guess I will be lifting the engine and grinding some glass if it is not right.
Then it is on to the forward part of the engine room. First step will be to replace the last of the rotten plywood in the main stringer. Then I will add the 6 new layers of glass over everything....
I will also need to build the main stringers up to support the generator. they had it sitting on top of two
4 x 4s which is not very professional looking. I also hope to build an enclosure around the generator so it will need a bottom...
Tuesday, February 24, 2015
Running oout of reasons
to not move the engine back in place....
I finished the 2nd layer on the outer stringer so I could glass the forward gusset in on the starboard side. So all that is done.
The last thing to go in was the fiberglass angle to support the section of walkway between the gussets. I built the jig that clamps to the side of the main stringer to support the glass work till it sets. The jig has blocks that sit on top of the string so the angles will all come out at the same height.
I finished the 2nd layer on the outer stringer so I could glass the forward gusset in on the starboard side. So all that is done.
The last thing to go in was the fiberglass angle to support the section of walkway between the gussets. I built the jig that clamps to the side of the main stringer to support the glass work till it sets. The jig has blocks that sit on top of the string so the angles will all come out at the same height.
Saturday, February 21, 2015
Working on Aft end of Starboard engine room stringers
Made a little more progress in the engine room today. My plan is to locate the compressor unit for the refrigeration between the main and outer stringers at the aft end of the engine room port side. The freezer will be located on the other side of the bulkhead with the 3 holes in it at the aft end of this platform .
I used another piece of the 3/4" PVC board for the platform. First I glassed a fiberglass angle onto the outside of the main stringer like I made for the walkway on the port side. Next I cut and fitted the PVC board. Then I glassed the board in with 3 layers of 1.5 Oz. mat and 1 Layer of 24 Oz Roving. I do not really need a lot of strength here but I wanted something thick enough that it would not star if something was dropped on it. I know there will be no problems with rot with the PVC board, even when I put fastenings into it through the glass work.
I also cut and fitted the first of the walkway panels to see how they will work out. I used the 3/4" PVC panel for this as well. It is supported by the hull on one side and a fiberglass angle I built on the outside of the main stringer. It just lifts out so you can clean under it. I guess I could run hoses under there though the over sized cut outs in the gussets.
So one of tomorrows jobs will be to transfer the diesel from the forward starboard fuel tank to the forward port fuel tank so I can change the bad rubber seals on the inspection ports. I bought the first Buna-N rubber from an online supplier. The rest I bought from a local hose and rubber distributor. This is the first stuff I bought.....
And this is the second stuff I bought. Boat the forward and aft tanks have been full for about the same amount of time. Unfortunately I do not know for sure which rubber is which. I guess I will find out when I fill the starboard tank. I know that the first rubber I bought was only enough to do two covers while I bought a lot more of the second one. I am sure that the Starboard tanks have the rubber from the second source.
What a pain in the ass.....
I used another piece of the 3/4" PVC board for the platform. First I glassed a fiberglass angle onto the outside of the main stringer like I made for the walkway on the port side. Next I cut and fitted the PVC board. Then I glassed the board in with 3 layers of 1.5 Oz. mat and 1 Layer of 24 Oz Roving. I do not really need a lot of strength here but I wanted something thick enough that it would not star if something was dropped on it. I know there will be no problems with rot with the PVC board, even when I put fastenings into it through the glass work.
I also cut and fitted the first of the walkway panels to see how they will work out. I used the 3/4" PVC panel for this as well. It is supported by the hull on one side and a fiberglass angle I built on the outside of the main stringer. It just lifts out so you can clean under it. I guess I could run hoses under there though the over sized cut outs in the gussets.
So one of tomorrows jobs will be to transfer the diesel from the forward starboard fuel tank to the forward port fuel tank so I can change the bad rubber seals on the inspection ports. I bought the first Buna-N rubber from an online supplier. The rest I bought from a local hose and rubber distributor. This is the first stuff I bought.....
And this is the second stuff I bought. Boat the forward and aft tanks have been full for about the same amount of time. Unfortunately I do not know for sure which rubber is which. I guess I will find out when I fill the starboard tank. I know that the first rubber I bought was only enough to do two covers while I bought a lot more of the second one. I am sure that the Starboard tanks have the rubber from the second source.
What a pain in the ass.....
Thursday, February 19, 2015
More grinding and glassing
Spent 4 hours this morning opening up limber holes and fairing in the edges of the recent glass work.
Here is the completed platform for the muffler. I made it a platform rather than a shelf so that dirt and junk could not get under it. It now a sealed off space in the boat.
Close-up showing the limber hole which just happen to come out in the wrong place. So I made a little channel to direct and leaks that come though it around the platform. The platform is made out of 3/4" PVC board so I do not have to worry about rot.
Next little job was to glass in an angle to support the walkway between the inner and outer stringers. I lowered the walkway so I can just about walk bent over in the engine room. Much better than crawling around on all 4's. I still need to clean the edge up. Oh boy more grinding...
Last job of the day was to re-enforce the glass work on the aft starboard gusset. I had already glassed it in when I started doing the main stringers. So I thought it would be better to just beef it up rather than rip the whole thing out and start over. The light spots are foam filler I put in to close up the holes that had been cut in it. I am planning to build another platform on this side to support the compressor unit for the freezer. So I do not need the limber hole at the bottom.
So I am very closet to ready to move the engine back in place. Then I need to beef up the glass work on the main stringers in the forward area of the engine room.
Here is the completed platform for the muffler. I made it a platform rather than a shelf so that dirt and junk could not get under it. It now a sealed off space in the boat.
Close-up showing the limber hole which just happen to come out in the wrong place. So I made a little channel to direct and leaks that come though it around the platform. The platform is made out of 3/4" PVC board so I do not have to worry about rot.
Next little job was to glass in an angle to support the walkway between the inner and outer stringers. I lowered the walkway so I can just about walk bent over in the engine room. Much better than crawling around on all 4's. I still need to clean the edge up. Oh boy more grinding...
Last job of the day was to re-enforce the glass work on the aft starboard gusset. I had already glassed it in when I started doing the main stringers. So I thought it would be better to just beef it up rather than rip the whole thing out and start over. The light spots are foam filler I put in to close up the holes that had been cut in it. I am planning to build another platform on this side to support the compressor unit for the freezer. So I do not need the limber hole at the bottom.
So I am very closet to ready to move the engine back in place. Then I need to beef up the glass work on the main stringers in the forward area of the engine room.
Friday, February 6, 2015
Port Stringer
Spent the afternoon glassing the after section of the Port main Stringer. I am always amazed at how long it takes. It took 3-1/2 hours of continues work to glass in this part. There are 6 layers in each 2' long section. The glass is 50" long to wrap from 7" on the hull up the inside, across the top, down the outside to finish with 6 inches on the hull again. So each piece is 8 Square feet and there are 6 pieces in each section which means that there are nearly 50 Square feet of material to cover 2 lineal feet of stringer. That makes me feel a little better about what I accomplished....
View from the main salon down into the engine room showing the port main stringer.You can see the Shaft coupling over the grey water tank at the aft end of the engine room. I am going to add s little section the width of from outside yo outside of the main stringers and back to the shower bulkhead to the engine room space. That way I will be able to get to the stuffing box from inside the engine room rather than some little hole in the cabin sole, which actually would be inside the shower in the aft head.....
View of the inside of the main stringer viewed from the bilge. The black marks you see are marks I made on the dry glass to line it up with the top edge of the stringer.
Sorry for the fuzzy pictures, I was out there at night with the flash.
Outside of the main stringer. You can see where the 2 pieces of glass joined about half way along (whitesh vertical line on side of stringer.)
I staggered the joints in the glass by 3".
Here is a shot of where one of the gussets was glassed to the outer stringer. The black at the bottom of the picture is partially rotten stringer. The builder installed all the framing timbers first then tried to glass over all of them. That resulted in multiple "holes" at the inside corners where water could get in. The way they did it the water was able to get into the stingers. If they had glassed the stringers in first and then glassed the gussets and bulkheads in afterwards the stringers would have bee sealed. I am correcting this slowly, one joint at a time. That is why I decided to tear the gussets out, glass the main stringer in and then replace the gussets. I will also be replacing the 1" think Mahogany timber with 1-1/2" thick fiberglass reinforced foam panels. Won't matter if it does leak then...
View from the main salon down into the engine room showing the port main stringer.You can see the Shaft coupling over the grey water tank at the aft end of the engine room. I am going to add s little section the width of from outside yo outside of the main stringers and back to the shower bulkhead to the engine room space. That way I will be able to get to the stuffing box from inside the engine room rather than some little hole in the cabin sole, which actually would be inside the shower in the aft head.....
View of the inside of the main stringer viewed from the bilge. The black marks you see are marks I made on the dry glass to line it up with the top edge of the stringer.
Sorry for the fuzzy pictures, I was out there at night with the flash.
Outside of the main stringer. You can see where the 2 pieces of glass joined about half way along (whitesh vertical line on side of stringer.)
I staggered the joints in the glass by 3".
Here is a shot of where one of the gussets was glassed to the outer stringer. The black at the bottom of the picture is partially rotten stringer. The builder installed all the framing timbers first then tried to glass over all of them. That resulted in multiple "holes" at the inside corners where water could get in. The way they did it the water was able to get into the stingers. If they had glassed the stringers in first and then glassed the gussets and bulkheads in afterwards the stringers would have bee sealed. I am correcting this slowly, one joint at a time. That is why I decided to tear the gussets out, glass the main stringer in and then replace the gussets. I will also be replacing the 1" think Mahogany timber with 1-1/2" thick fiberglass reinforced foam panels. Won't matter if it does leak then...
Subscribe to:
Posts (Atom)